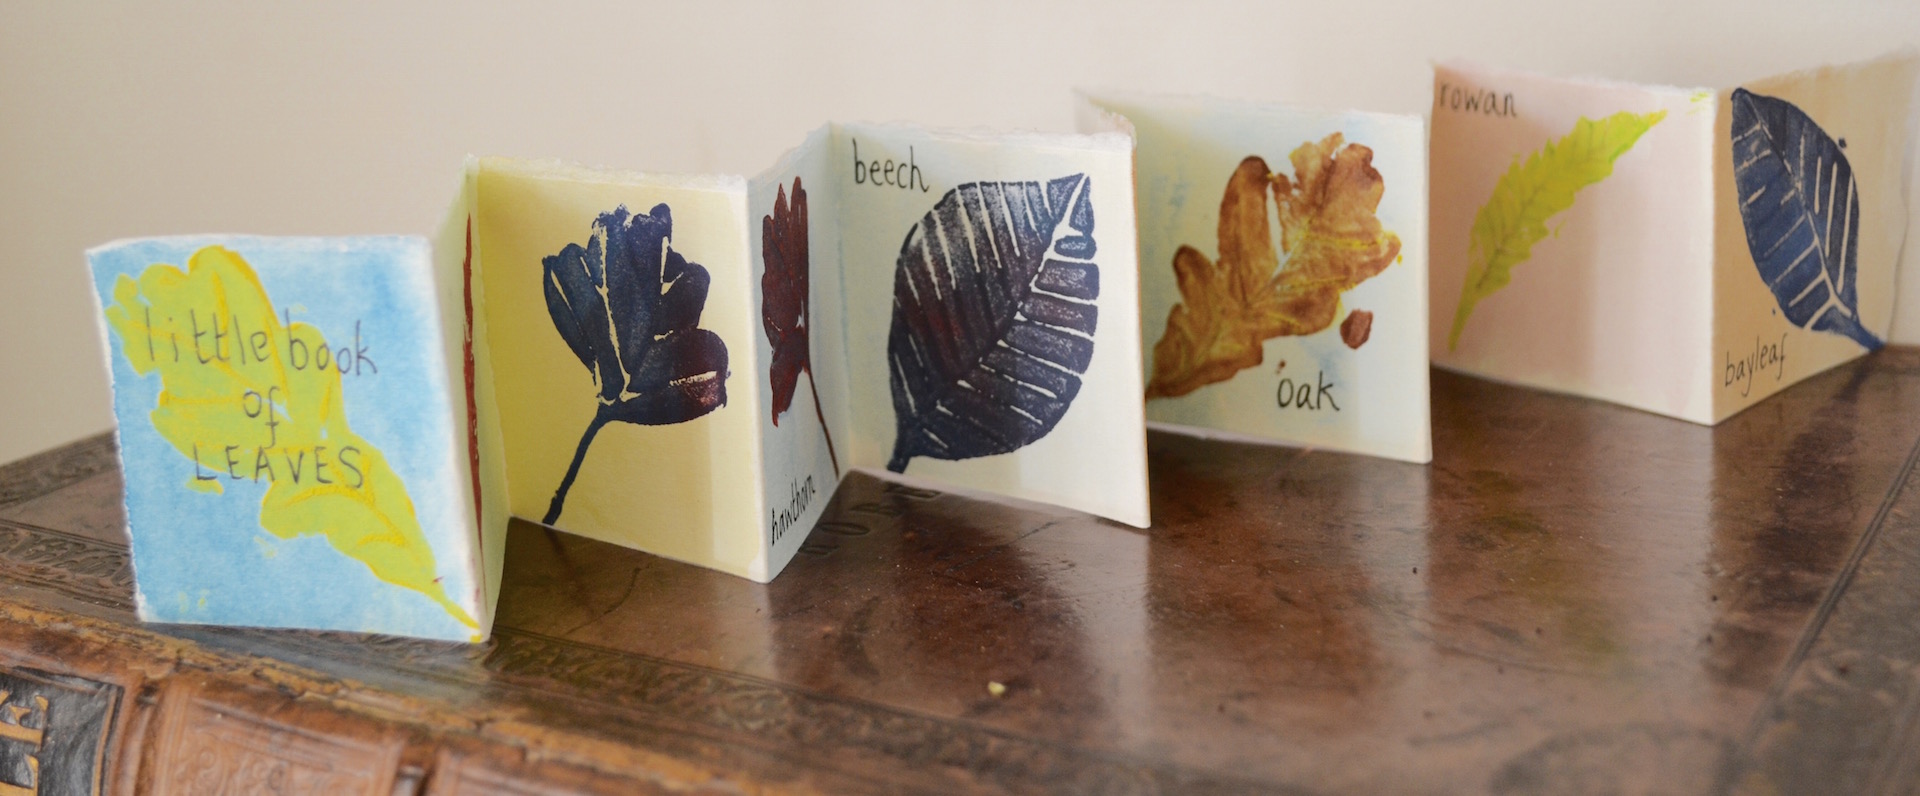

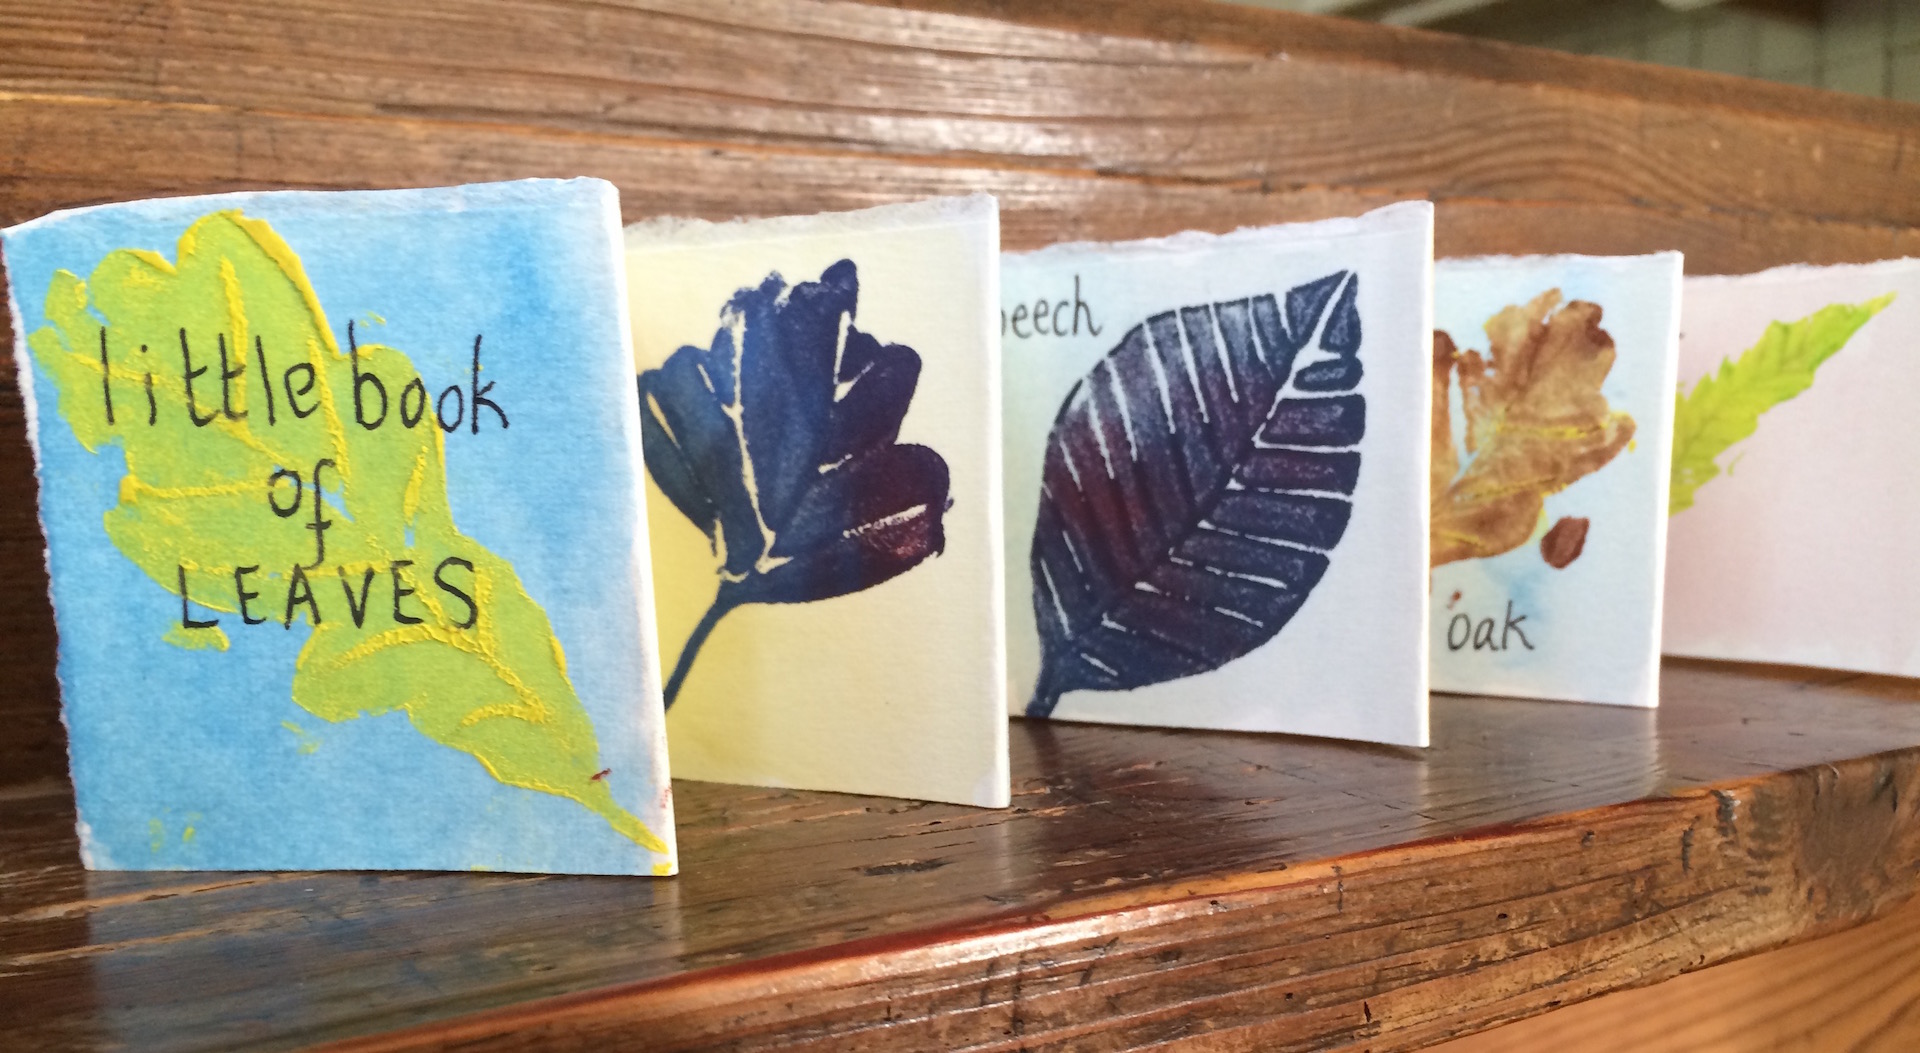
Home made nature journals are a brilliant project to undertake. It’s really simple to make your own book. A folding one is the easiest and quickest type to create – and you don’t need any drawing or painting skills to do it. Mine was made using simple leaf prints using finds I’d collected on a recent walk. I just transferred the leaf shapes on to a foam sheet to make basic printing stamps which can be reused time and again. Keep them as a record, or give them as greetings cards. They also make a beautiful personalised gift if you put them in a little box.
How to make a book
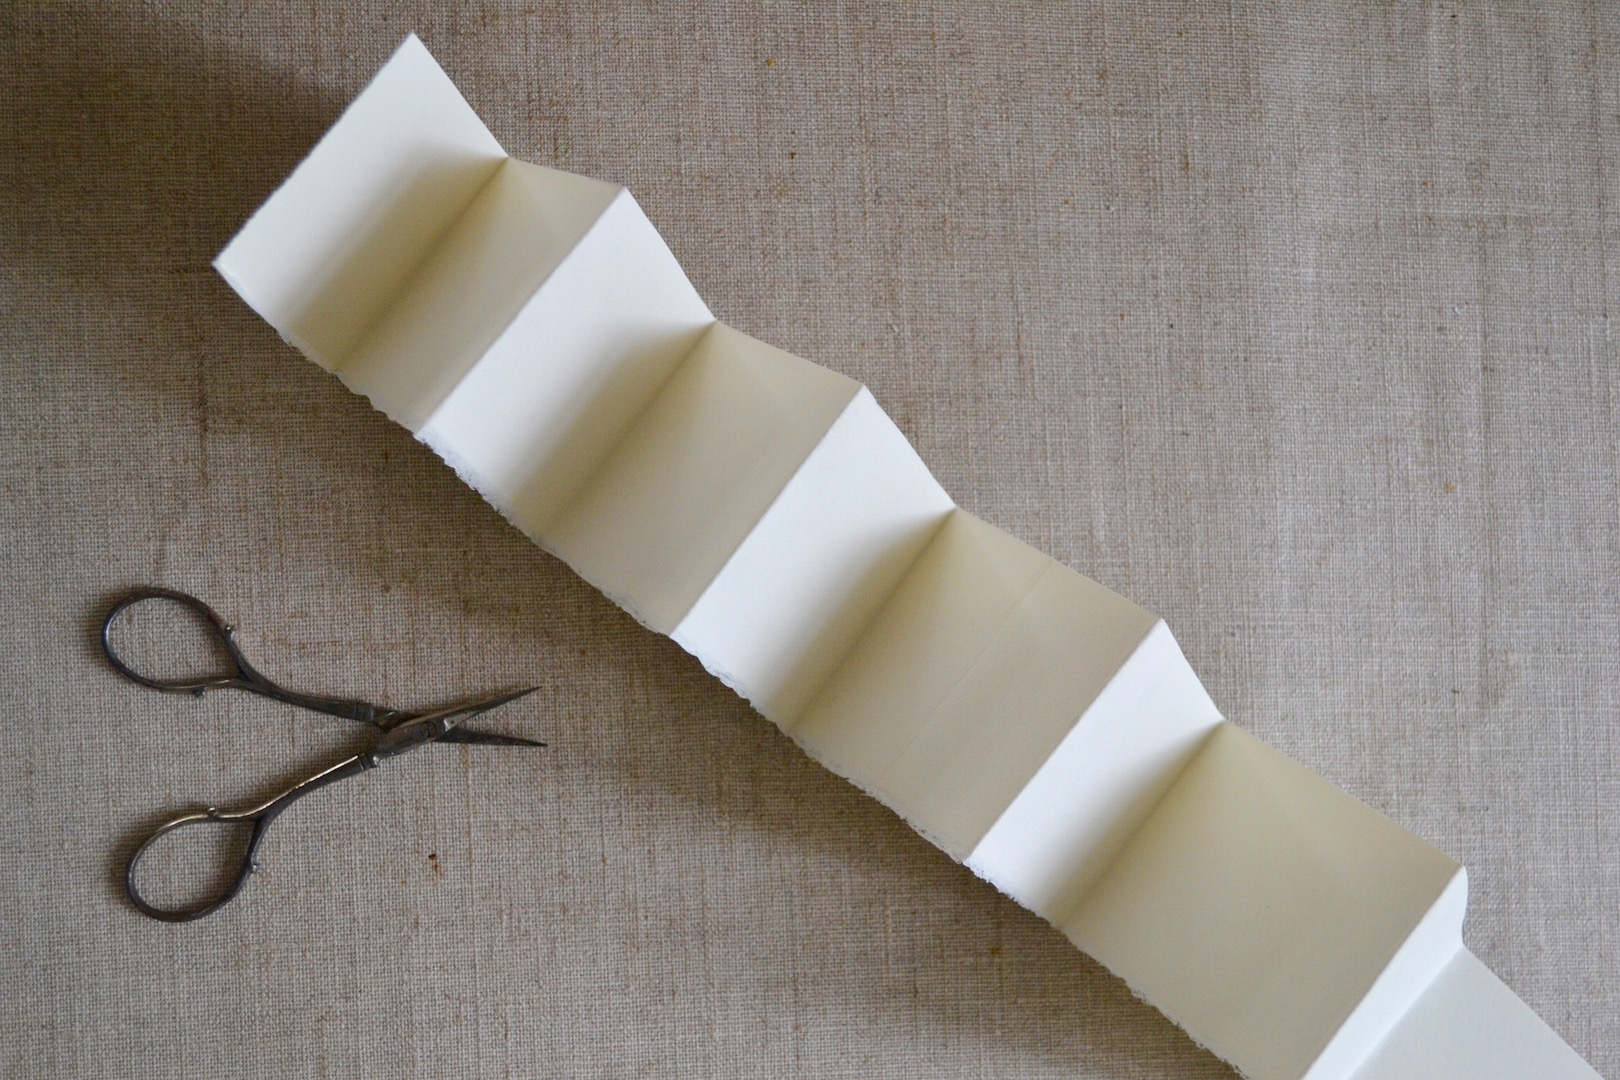
A folded book is really just a concertina made from paper. I chose a thick, creamy sheet of card from my local art shop. I needed it to be strong enough not to wrinkle when paint or printing ink is applied. I folded it into equal squares. I left one edge rough, because I liked the unfinished look of it. Next, I applied a watercolour wash in different soft colours and let it dry. This was just to make it look less stark, you can keep the paper cream if you prefer.

I chose a selection of different leaves, small enough to fit on my book pages. These are templates for the stamps. I like the shape of oak, hawthorn, rowan and bay. Ivy is a good choice because you can sometimes find perfectly heart-shaped leaves.
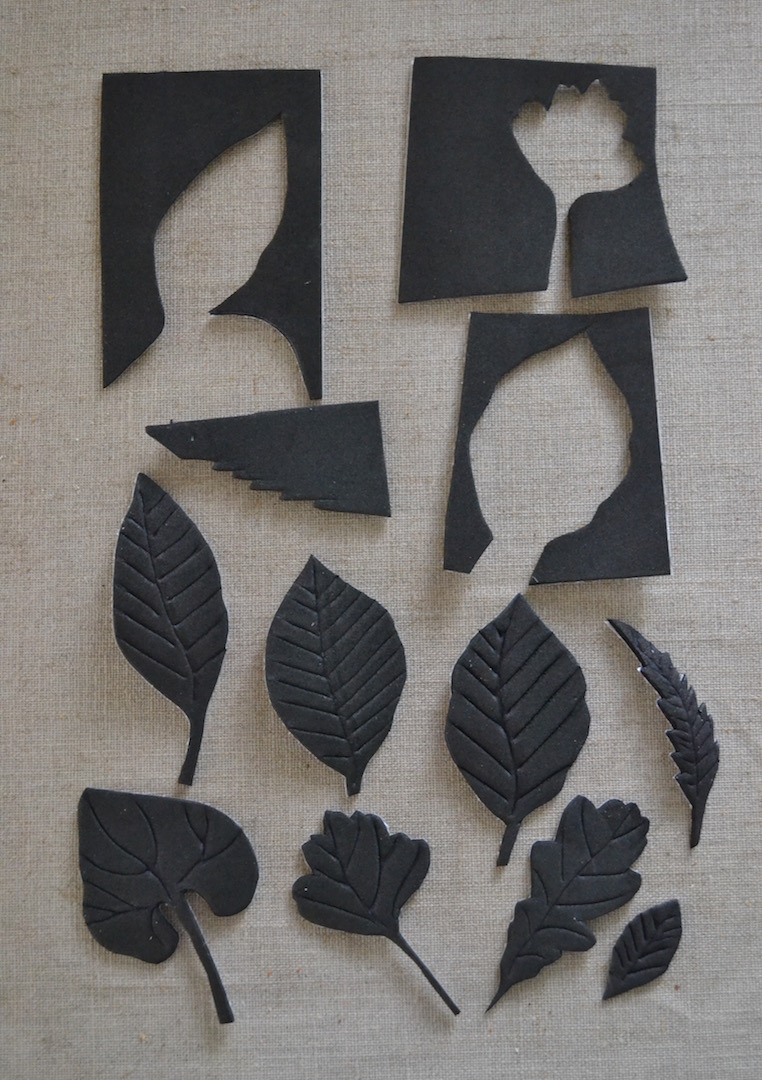
I took the leaves, placed them on a sheet of Self Adhesive Foam (purchased from Hobbycraft for around £1 a sheet), drew around them and cut them out. Using a ball point pen, I drew in the leaf veins on the foam side. Press hard, so you create very defined lines. You need to do this to get the detail when you come to make the print.

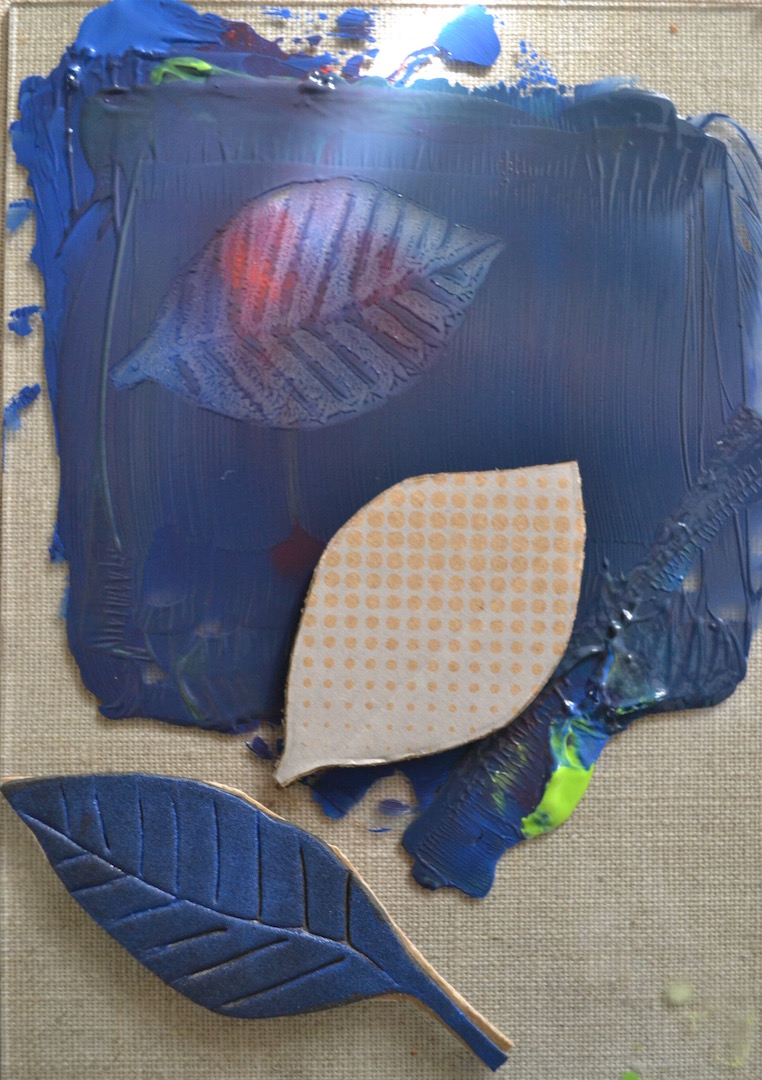
Stick the adhesive foam leaf shape on to a piece of cardboard to strengthen the print stamp and cut around it. It just means it’s easier to handle when you’re printing. Now take a sheet of glass (the inside of an old picture frame is ideal) and put a small blob of water based printing ink on it. Use a small roller to flatten the ink and create an even coat. Press the leaf stamp into it, then apply firmly to the first page of your folded book. Repeat until your pages are filled.
Select your style
You can use different colours for each leaf, or keep it simple and stylish and just do a black and white book if you prefer. Once the book has dried, handwrite the leaf names into place.
Don’t stop with leaves. Try fruit, or anything with an interesting shape or texture. I bought my art supplies for this project from my local independent shop and from this good website, http://www.greatart.co.uk
Taking it further
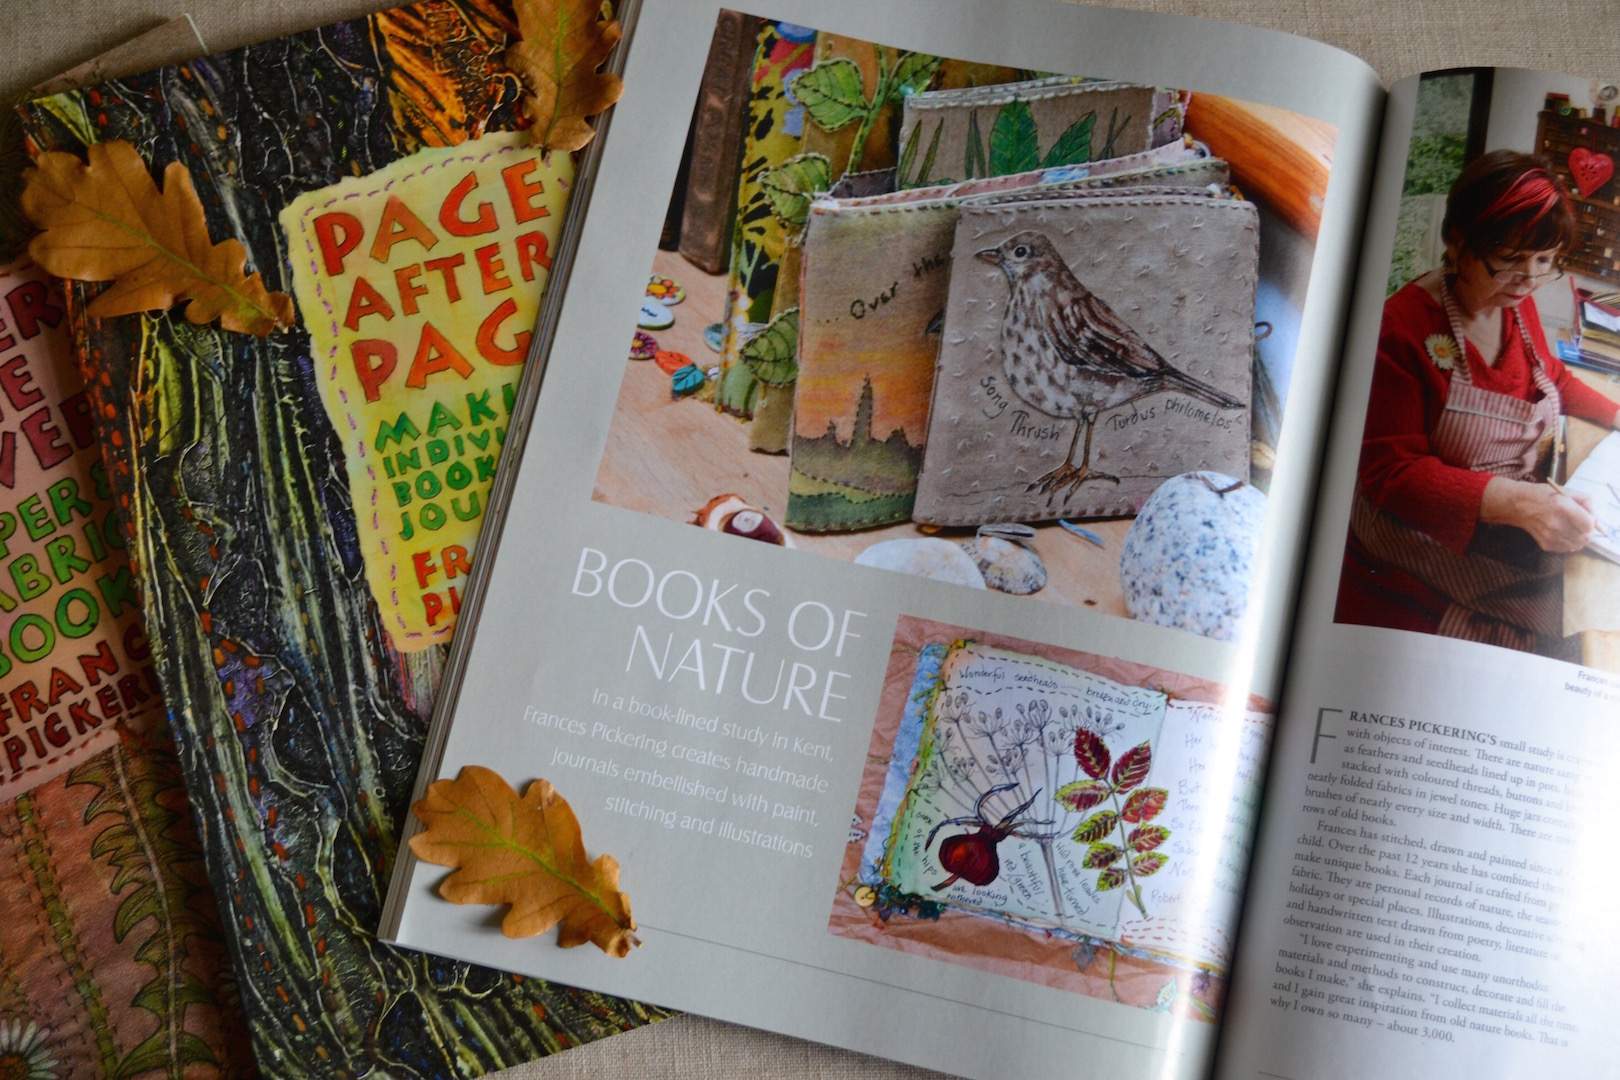
If you get the handmade book bug (and it is a bit addictive) and want to make something more complicated, I recommend two books, Page After Page, Making Individual Books and Journals and Under the Cover, Paper and Fabric Books, both written by artist Frances Pickering and published by www.artvango.co.uk. Frances makes the most incredible journals from paper and fabric, each one stitched, dyed, illustrated and painted from scratch.
I was lucky enough to meet and interview Frances for LandScape magazine a couple of years ago. I went to see her and her lovely husband Jim at their home in a Kent village. I knew it was going to be a good day when I got off the train and the ticket officer at the little station called out to me and said: “are you the lady who’s doing the interview today?” I felt as if I’d fallen back into the 1940s. I had a brilliant time seeing how Frances creates her books, usually starting with a sheet of wallpaper lining paper. She has a website, and teaches journal making around the country. http:/www.frannyp.co.uk
I came away feeling thoroughly inspired. I wrote my article (above) and ever since that day, I’ve usually had some sort of journal on the go.